The Definitive Guide: How to Remove Mould from Painted Walls in the UK
Discovering mould on your painted walls can be a homeowner’s nightmare. Not only is it unsightly, but it also poses potential health risks and can indicate underlying dampness issues. In the UK, with its damp climate, mould is a common problem, but it’s one that can be effectively addressed with the right knowledge and techniques. This comprehensive guide provides everything you need to know about how to remove mould from painted walls uk, from identifying different types of mould to preventative measures, ensuring a healthy and aesthetically pleasing home. We’ll delve into proven methods, safe cleaning solutions, and expert tips to tackle mould effectively and prevent its return. This isn’t just a quick fix; it’s a long-term solution informed by years of practical experience.
Understanding Mould Growth on Painted Walls
Mould isn’t just a surface problem; it’s a symptom of a larger issue. Before you even consider cleaning, it’s crucial to understand what mould is and why it’s growing on your walls. Mould is a type of fungus that thrives in damp, poorly ventilated environments. It reproduces through tiny spores that are always present in the air, both indoors and outdoors. When these spores land on a surface with sufficient moisture and organic material (like dust, dirt, or even the paint itself), they can begin to grow and form colonies.
Types of Mould Commonly Found in UK Homes
Several types of mould can appear on painted walls, each with its own characteristics:
- Black Mould (Stachybotrys chartarum): Often the most feared, black mould is easily identifiable by its dark green or black colour and slimy texture. It’s associated with serious health problems and requires professional remediation for large infestations.
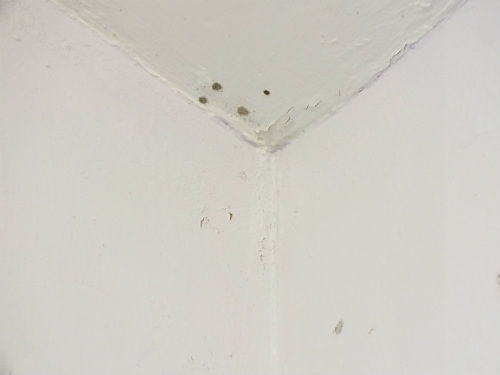
- Green Mould (Cladosporium): A very common mould found on painted walls in damp areas such as bathrooms or kitchens.
- White Mould (Aspergillus, Penicillium, Cladosporium): Can appear as a powdery or cotton-like substance. It often grows in areas with high humidity, such as basements or bathrooms.
- Yellow Mould (Serpula lacrymans): Less common on walls but can appear if there is significant water damage.
Identifying the Underlying Cause of Mould
Removing the mould itself is only half the battle. To prevent its return, you need to identify and address the source of the moisture. Common causes include:
- Leaking Pipes: Even a small, slow leak can provide enough moisture for mould to thrive.
- Poor Ventilation: Lack of airflow allows moisture to build up, particularly in bathrooms and kitchens.
- Rising Damp: Moisture from the ground rising through the walls.
- Penetrating Damp: Rainwater seeping through cracks in the walls or roof.
- Condensation: Occurs when warm, moist air comes into contact with cold surfaces.
Thoroughly inspect the affected area and surrounding areas for any signs of leaks, dampness, or poor ventilation. If you suspect a serious damp problem, consult a professional surveyor.
Essential Tools and Safety Precautions for Mould Removal
Before you begin the mould removal process, gather the necessary tools and take appropriate safety precautions to protect yourself from exposure to mould spores.
Required Tools and Materials
- Protective Gear:
- Gloves: Wear waterproof gloves to protect your skin from direct contact with mould and cleaning solutions.
- Mask: Use an N95 or P100 respirator mask to prevent inhaling mould spores.
- Eye Protection: Wear goggles to protect your eyes from splashes and spores.
- Old Clothes: Wear clothes that you don’t mind getting dirty or stained, and wash them immediately after cleaning.
- Cleaning Solutions:
- Mild Detergent: A gentle dish soap or all-purpose cleaner diluted in water.
- White Vinegar: A natural disinfectant and mould killer.
- Bleach Solution: A strong disinfectant (use with caution and proper ventilation).
- Mould-Specific Cleaners: Commercially available mould and mildew removers.
- Cleaning Equipment:
- Spray Bottle: For applying cleaning solutions.
- Sponges and Cloths: Use disposable cloths or sponges to avoid spreading mould spores.
- Scrub Brush: For scrubbing stubborn mould stains.
- Bucket: For mixing cleaning solutions.
- Vacuum Cleaner with HEPA Filter: For removing loose mould spores (optional).
Safety Precautions
- Ventilation: Ensure the area is well-ventilated by opening windows and doors. Use a fan to circulate air if necessary.
- Isolation: Seal off the affected area from the rest of the house to prevent mould spores from spreading. Use plastic sheeting and tape to create a barrier.
- Avoid Mixing Chemicals: Never mix bleach with ammonia or other cleaning products, as this can create toxic fumes.
- Protect Surroundings: Cover nearby furniture and flooring with plastic sheeting to prevent damage from cleaning solutions.
- Wash Thoroughly: After cleaning, wash your hands and face thoroughly with soap and water.
Step-by-Step Guide: Removing Mould from Painted Walls
Now that you have the necessary tools and safety precautions in place, follow these steps to effectively remove mould from painted walls:
Step 1: Preparation
Prepare the area by covering furniture and flooring with plastic sheeting. Open windows and doors to ensure adequate ventilation. Put on your protective gear, including gloves, mask, and eye protection.
Step 2: Cleaning Solution Application
Choose your preferred cleaning solution. For mild mould growth, a solution of mild detergent and water or white vinegar may be sufficient. For more stubborn mould, a diluted bleach solution (1 part bleach to 10 parts water) or a commercially available mould cleaner may be necessary. Apply the cleaning solution to the affected area using a spray bottle or sponge.
Step 3: Scrubbing
Gently scrub the mouldy area with a sponge or scrub brush. Avoid scrubbing too vigorously, as this can damage the paint. Work in small sections and rinse the sponge or cloth frequently to prevent spreading mould spores.
Step 4: Rinsing
Rinse the cleaned area with clean water to remove any remaining cleaning solution and mould residue. Use a clean sponge or cloth to wipe down the wall.
Step 5: Drying
Thoroughly dry the cleaned area with a clean towel or cloth. You can also use a fan or dehumidifier to speed up the drying process. Ensure the wall is completely dry to prevent mould from returning.
Step 6: Inspection and Repetition (If Necessary)
Inspect the cleaned area for any remaining mould. If necessary, repeat the cleaning process. For stubborn mould stains, you may need to apply the cleaning solution and let it sit for a few minutes before scrubbing.
Choosing the Right Cleaning Solution: A Detailed Comparison
Selecting the appropriate cleaning solution is crucial for effective mould removal while minimizing damage to your painted walls. Here’s a detailed comparison of common options:
Mild Detergent and Water
- Effectiveness: Best for removing surface mould and dirt. Less effective on deeply embedded mould.
- Pros: Gentle on paint, readily available, inexpensive.
- Cons: May not be strong enough for significant mould growth.
- Ideal For: Routine cleaning and maintenance to prevent mould buildup.
White Vinegar
- Effectiveness: Effective against a wide range of mould species.
- Pros: Natural, non-toxic, readily available, effective disinfectant.
- Cons: Can have a strong odour, may require multiple applications for stubborn mould.
- Ideal For: Mild to moderate mould growth, safe for use around children and pets.
Bleach Solution
- Effectiveness: Powerful disinfectant, effective at killing mould spores on non-porous surfaces.
- Pros: Readily available, relatively inexpensive.
- Cons: Can damage paint, release harmful fumes, not effective on porous surfaces, may discolour the wall.
- Ideal For: Stubborn mould growth on surfaces that can withstand bleach, use with caution and proper ventilation.
Mould-Specific Cleaners
- Effectiveness: Formulated specifically to kill and remove mould, often contains fungicides.
- Pros: Highly effective, may contain ingredients to prevent future mould growth.
- Cons: Can be more expensive than other options, may contain harsh chemicals, read the label carefully.
- Ideal For: Moderate to severe mould growth, use according to manufacturer’s instructions.
Preventing Mould Regrowth: Long-Term Solutions
Removing mould is only the first step. To prevent it from returning, you need to address the underlying cause of the moisture and take steps to improve ventilation and reduce humidity.
Addressing the Source of Moisture
- Repair Leaks: Fix any leaking pipes, roofs, or windows immediately.
- Improve Drainage: Ensure that gutters and downspouts are clean and functioning properly.
- Control Condensation: Insulate cold surfaces, such as pipes and walls, to prevent condensation.
Improving Ventilation
- Open Windows: Open windows regularly to allow fresh air to circulate, especially in bathrooms and kitchens.
- Use Extractor Fans: Use extractor fans in bathrooms and kitchens to remove moisture during and after showering or cooking.
- Install Air Vents: Install air vents to improve airflow in poorly ventilated areas.
Reducing Humidity
- Use a Dehumidifier: Use a dehumidifier to remove excess moisture from the air.
- Dry Clothes Outdoors: Avoid drying clothes indoors, as this can increase humidity levels.
- Vent Appliances: Vent clothes dryers and other appliances that produce moisture to the outside.
When to Call a Professional Mould Remediation Service
While you can often remove mould yourself, there are situations where it’s best to call a professional mould remediation service. These include:
- Large Infestations: If the mould covers a large area (more than 1 square meter), it’s best to let the professionals handle it.
- Health Concerns: If you have allergies, asthma, or other respiratory problems, avoid cleaning mould yourself and hire a professional.
- Unknown Source: If you can’t identify the source of the moisture, a professional can help you find and fix the problem.
- Black Mould: Black mould (Stachybotrys chartarum) is associated with serious health problems and requires professional remediation.
- Recurring Mould: If mould keeps returning despite your best efforts, a professional can help you identify and address the underlying cause.
Expert Advice for a Mould-Free Home
Maintaining a mould-free home requires diligence and a proactive approach. Simple steps can make a significant difference. Regular cleaning, ensuring proper ventilation, and prompt attention to any signs of dampness are crucial. It’s also worth considering mould-resistant paints for areas prone to moisture, such as bathrooms and kitchens. These paints contain additives that inhibit mould growth, providing an extra layer of protection. As a seasoned property maintenance expert, I’ve seen firsthand how these preventative measures can save homeowners considerable time, money, and stress in the long run. Remember, tackling even minor mould issues early on is far easier than dealing with a full-blown infestation.
Achieving a Healthy, Mould-Free Home
Removing mould from painted walls is achievable with the right knowledge, tools, and precautions. By understanding the causes of mould, following the steps outlined in this guide, and taking preventative measures, you can create a healthy and mould-free home environment. Remember to prioritise safety and seek professional help when needed. Addressing the root cause of moisture is vital for long-term success. Don’t hesitate to consult with a damp proofing specialist if you suspect rising or penetrating damp. By taking a proactive approach, you can protect your home and your health from the harmful effects of mould. Share your experiences with how to remove mould from painted walls uk in the comments below, and let’s work together to create healthier homes.
